Deploy to production
We'll follow the steps in Reference > Production.
1․ Create an Ubuntu VPS in e.g. DigitalOcean. Give it at least 1GB of memory. Here's a DigitalOcean referral link that'll give you $200 of credit.
Create a Digital Ocean account if you don't have one already. Go to the create droplet page. Change the default droplet to something cheaper:

Also be sure to select an SSH key:
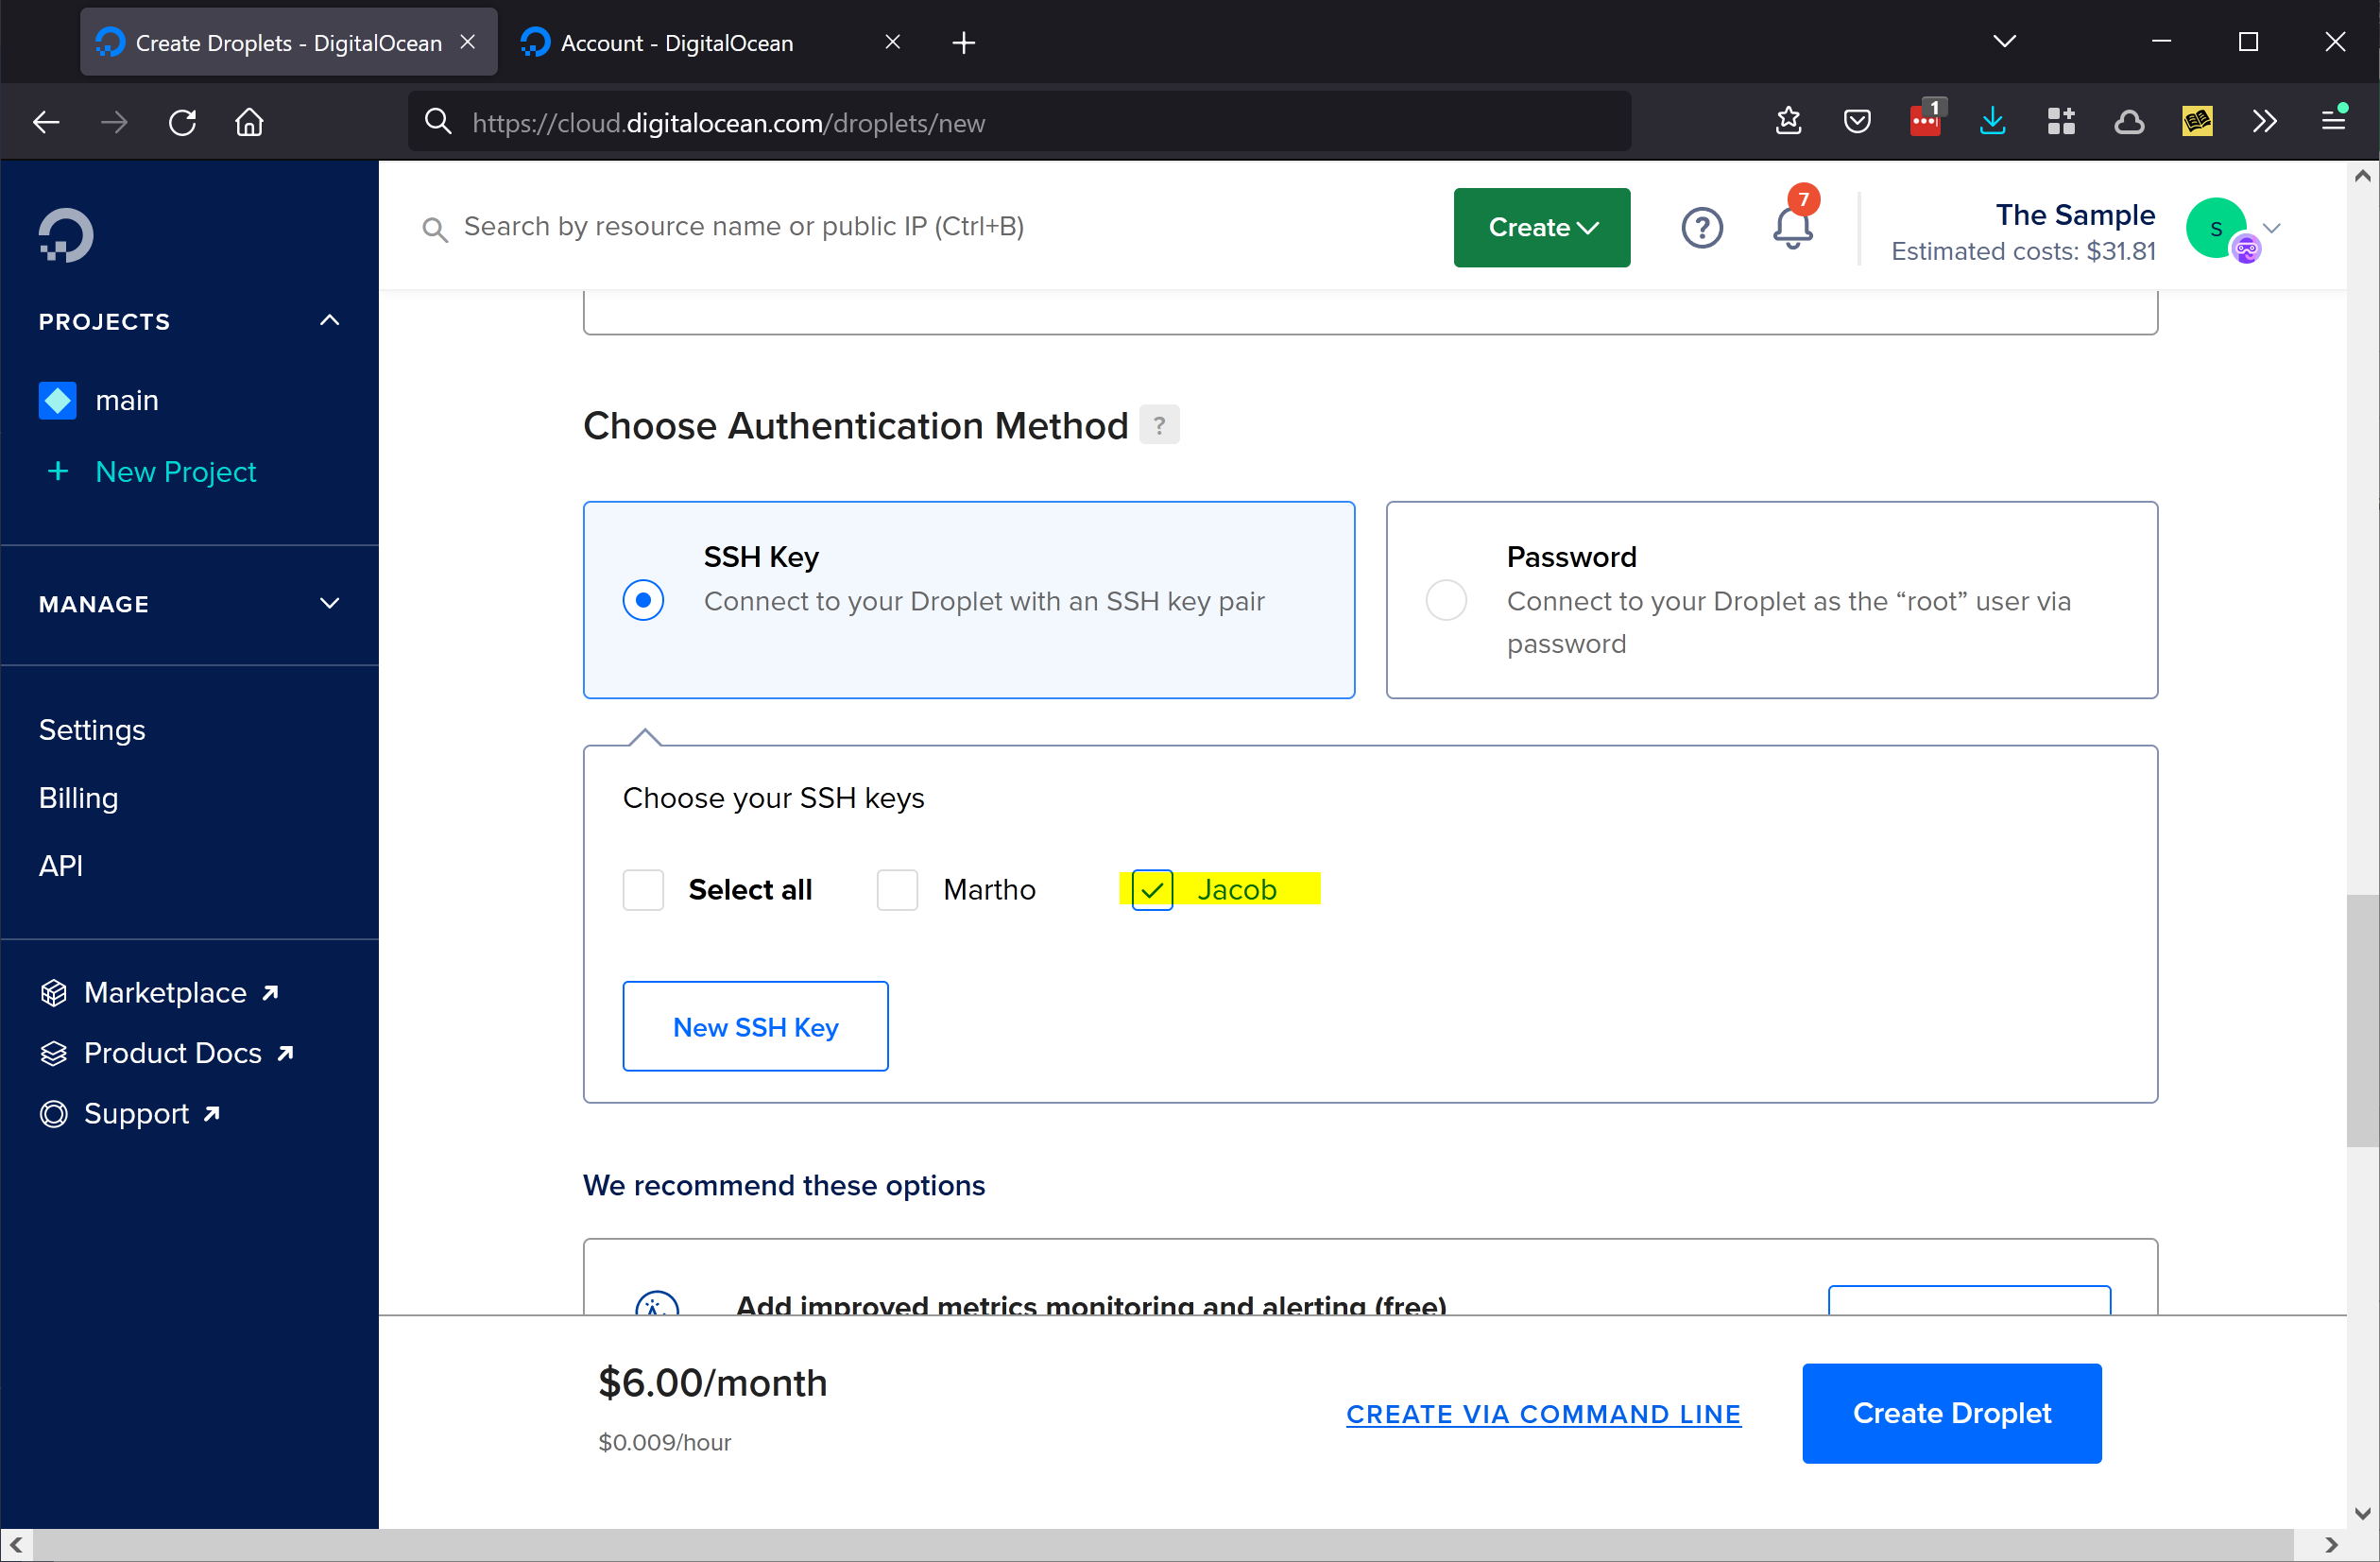
You may need to add a new SSH key to your Digital Ocean account if you haven't done so already.
Now you can create the droplet.
2․ (Optional) If this is an important application, you may want to set up a managed Postgres instance and edit
config.envto use that for XTDB's storage backend instead of the filesystem. With the default standalone topology, you'll need to handle backups yourself, and you can't use more than one server.
We'll skip this. If you're deploying a Real Application with Real Users, you should at least enable Digital Ocean's weekly filesystem backups when you create the droplet, and preferably use their managed Postgres offering.
- Edit
config.envand setDOMAINto the domain you'd like to use for your app. For now we'll assume you're usingexample.com. (If you haven't runclj -M:dev devyet,config.envwon't exist. You can create it withclj -M:dev generate-config.)
I'll use eelchat.biffweb.com for my domain. Replace that with whatever domain
you're using:
# config.env
DOMAIN=eelchat.biffweb.com
...
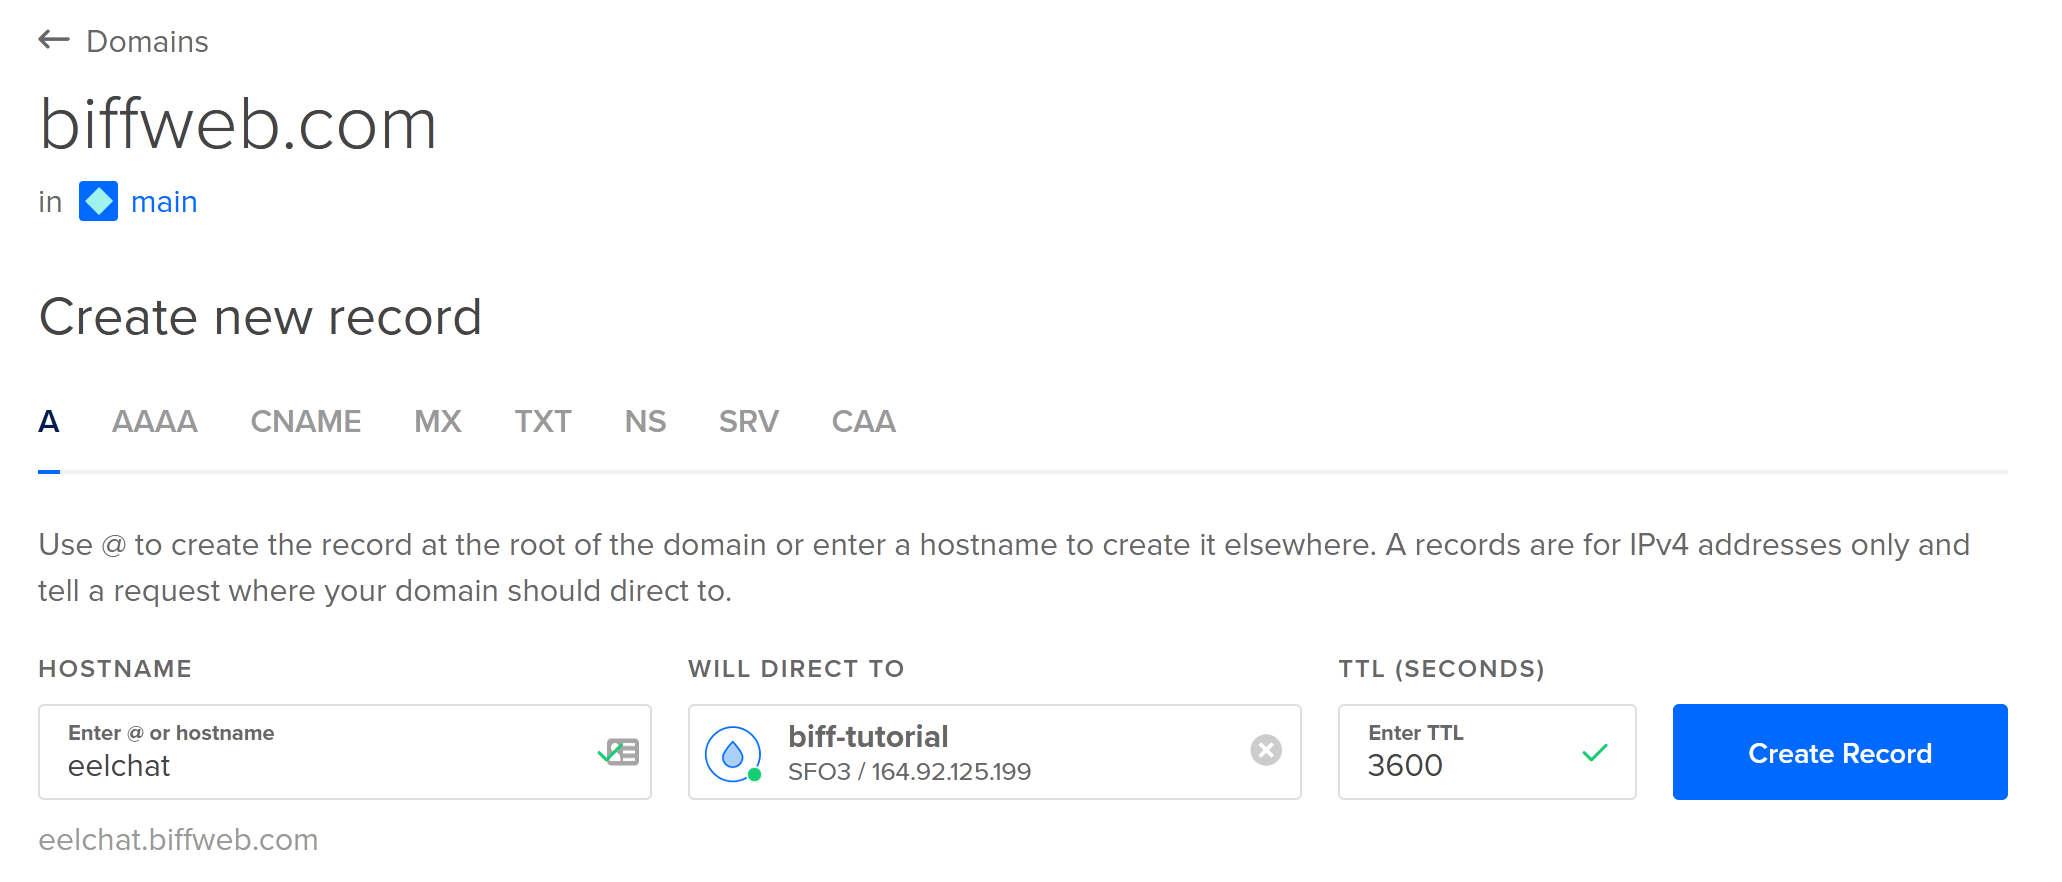
4․ Set an A record on example.com that points to your Ubuntu server.
As a prerequisite to this step, you'll need to register a domain somewhere. I use
Namecheap. After you point the domain at Digital Ocean's name servers,
you can add the domain to your DigitalOcean account.
Then, create an A record for the domain (or a subdomain) and point it at the droplet you created earlier.
I'm using the eelchat.biffweb.com subdomain:
5․ Make sure you can ssh into the server, then run
scp server-setup.sh root@example.com:.
Go ahead and run the command:
$ scp server-setup.sh root@eelchat.biffweb.com:
The authenticity of host 'eelchat.biffweb.com (164.92.125.199)' can't be established.
ECDSA key fingerprint is SHA256:BKnRyRjJlwsQTWi9ktWVz2gQz7sLBa2vuB4dNghFlGI.
Are you sure you want to continue connecting (yes/no/[fingerprint])? yes
Warning: Permanently added 'eelchat.biffweb.com,164.92.125.199' (ECDSA) to the list of known hosts.
server-setup.sh                                    100% 3278    50.3KB/s   00:00
6․ Run
ssh root@example.com, thenbash server-setup.sh. After it finishes, runreboot.
$ ssh root@eelchat.biffweb.com
Welcome to Ubuntu 22.10 (GNU/Linux 5.19.0-23-generic x86_64)
[...]

root@biff-tutorial:~# bash server-setup.sh
+ set -e
+ BIFF_ENV=prod
+ CLJ_VERSION=1.11.1.1165
[...]
While server-setup.sh runs, you'll be asked a few questions. For the first few questions,
you can go with the defaults (i.e. just press Enter). When you get to part where
server-setup.sh tries to provision an SSL certificate for your domain (via the certbot command),
you'll need to enter your domain and answer the other questions appropriately:
+ certbot --nginx
Saving debug log to /var/log/letsencrypt/letsencrypt.log
Enter email address (used for urgent renewal and security notices)
 (Enter 'c' to cancel): youremail@example.com

- - - - - - - - - - - - - - - - - - - - - - - - - - - - - - - - - - - - - - - -
Please read the Terms of Service at
https://letsencrypt.org/documents/LE-SA-v1.3-September-21-2022.pdf. You must
agree in order to register with the ACME server. Do you agree?
- - - - - - - - - - - - - - - - - - - - - - - - - - - - - - - - - - - - - - - -
(Y)es/(N)o: yes

- - - - - - - - - - - - - - - - - - - - - - - - - - - - - - - - - - - - - - - -
Would you be willing, once your first certificate is successfully issued, to
share your email address with the Electronic Frontier Foundation, a founding
partner of the Let's Encrypt project and the non-profit organization that
develops Certbot? We'd like to send you email about our work encrypting the web,
EFF news, campaigns, and ways to support digital freedom.
- - - - - - - - - - - - - - - - - - - - - - - - - - - - - - - - - - - - - - - -
(Y)es/(N)o: no
Account registered.
Please enter the domain name(s) you would like on your certificate (comma and/or
space separated) (Enter 'c' to cancel): eelchat.biffweb.com
Requesting a certificate for eelchat.biffweb.com

Successfully received certificate.
[...]
The entire process should take under 5 minutes. When it's done, run reboot.
- (Optional) On your local machine, run
git remote add prod ssh://app@example.com/home/app/repo.git. This is required if you don't haversyncinstalled. If your default git branch ismaininstead ofmaster, you'll also need to edit:biff.tasks/deploy-cmdinresources/config.edn.
Most people won't need to do this, but we'll add the remote for demonstration
anyway. After that, we can go ahead and deploy our app with clj -M:dev deploy:
$ git remote add prod ssh://app@eelchat.biffweb.com/home/app/repo.git

$ git add .

$ git commit -m "Add the landing page"

$ clj -M:dev deploy
[...]
After the command finishes, run clj -M:dev logs and look for the System started
message. This part may take a minute or so. Once you see it, you can load the
website in your web browser!
Sending email
At this stage, when you sign in to eelchat, it will still print the sign-in
link to the console instead of emailing it to you. You can get the sign-in link
for your production app by running clj -M:dev logs.
If you'd like to actually send the link via email (which you'll need to do at
some point if you plan on having users), create a
MailerSend account. Once you have a MailerSend API key
and sending identity, add them to config.env:
# config.env
MAILERSEND_FROM=hello@example.com
MAILERSEND_API_KEY=abc123
...
Then register your site with reCAPTCHA. Select
v2 Invisible for the reCAPTCHA type. Add your domain and localhost to the
allowed domains. Then add your credentials to config.env:
# config.env
RECAPTCHA_SITE_KEY=abc123
RECAPTCHA_SECRET_KEY=def456
...
Then run clj -M:dev deploy to make the config changes take effect.